 Login
Login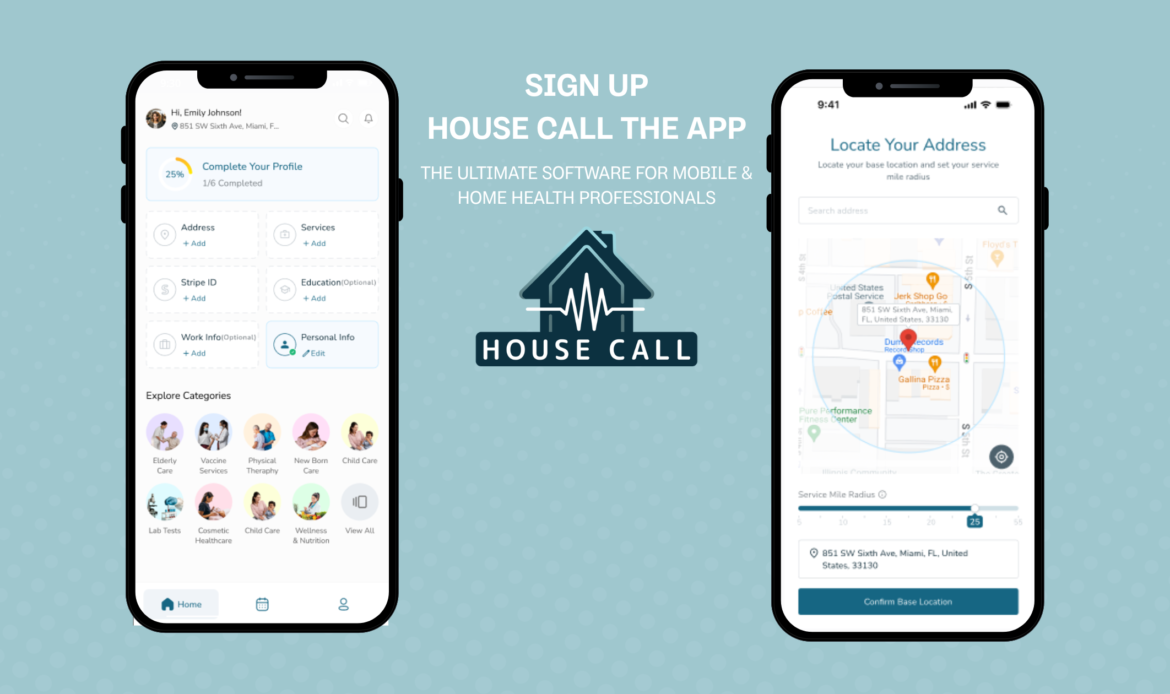
A Quick First Steps Guide for Providers.
A step-by-step onboarding guide
Welcome to House Call! We’re excited to have you join our growing network of healthcare professionals bringing care directly to patients’ homes. This guide will walk you through how to set up your profile, complete your background check, and start accepting appointments.
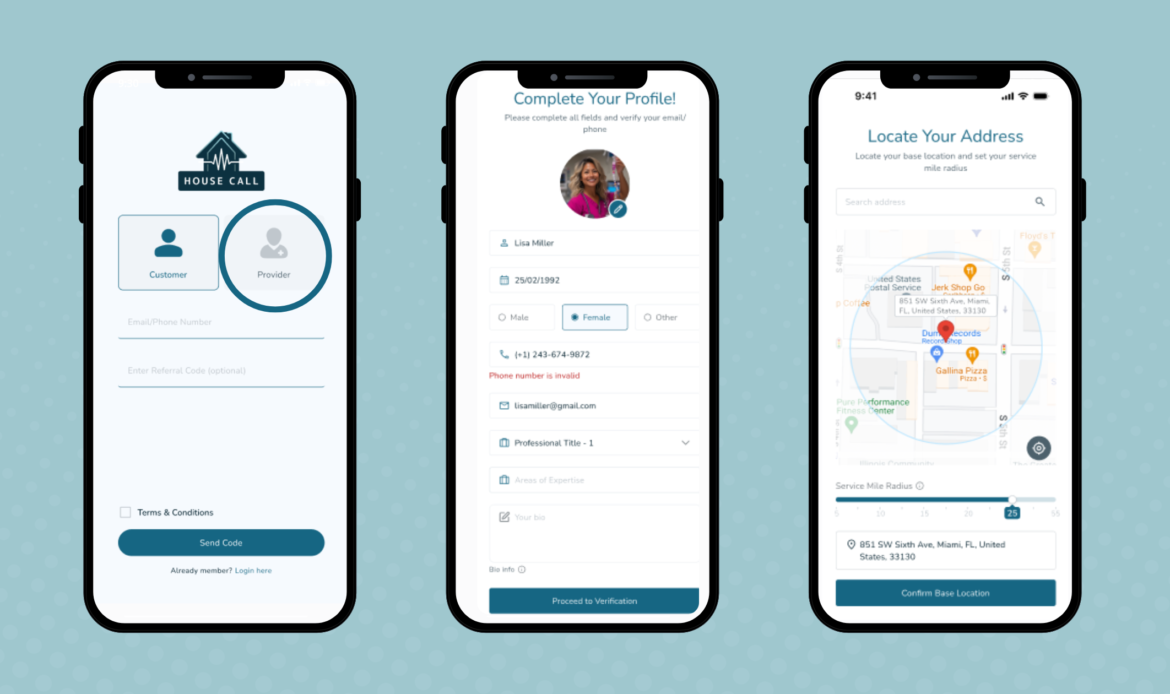
Step 1: Sign Up & Complete Your Profile
Sing Up and fill in your basic profile details:
- Download the House Call app and tap “Sign up.”
- Choose “Provider.”
- Verify your email and phone using the OTP (one-time password) sent to your inbox.
- Upload a professional profile photo
- Enter your first and last name
- Add your date of birth and gender
- Write a short bio and add your areas of expertise
Step 2: Add Education and Work Experience (optional)
Provide details about your background to build out your profile for prospective customers to see:
- List your educational background
- Add any current or previous professional experience
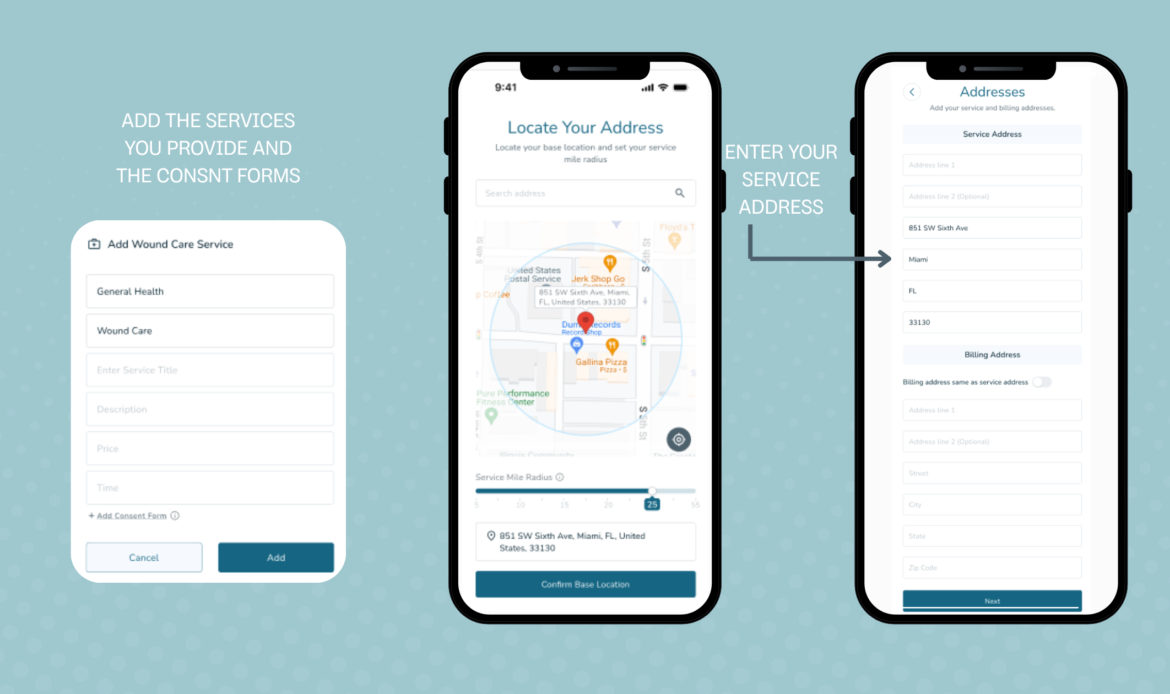
Step 3: Set Up Your Services & Radius
Tell us what you offer & where:
- List the services you offer and set your own prices
- Select your service location by dropping a pin on the map
- Select your mile radius – the distance you’re willing to travel for home visits
Step 4: Connect to Stripe to Get Paid
To receive payouts, you’ll need to connect your account to Stripe:
- Tap on “Connect Stripe Account”
- Follow the steps to set up your payment details
Payouts will be sent automatically to your bank account based on Stripe’s schedule.
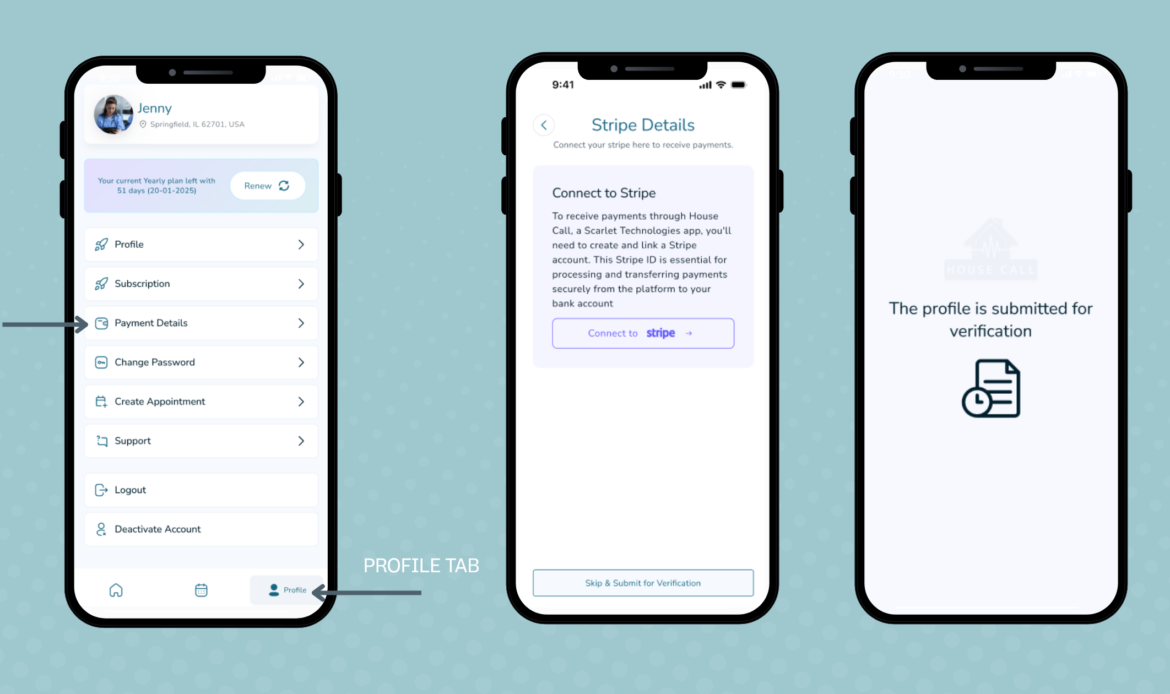
Step 5: Complete Background Check
After submitting this information, you’ll receive an automated email to complete your background check and upload your professional license.
Important: A background check is mandatory for all providers to ensure safety and trust on the platform.
Approval typically takes 24–72 hours. You’ll receive a notification once your profile is approved and live. After that, you can review or edit your profile anytime.
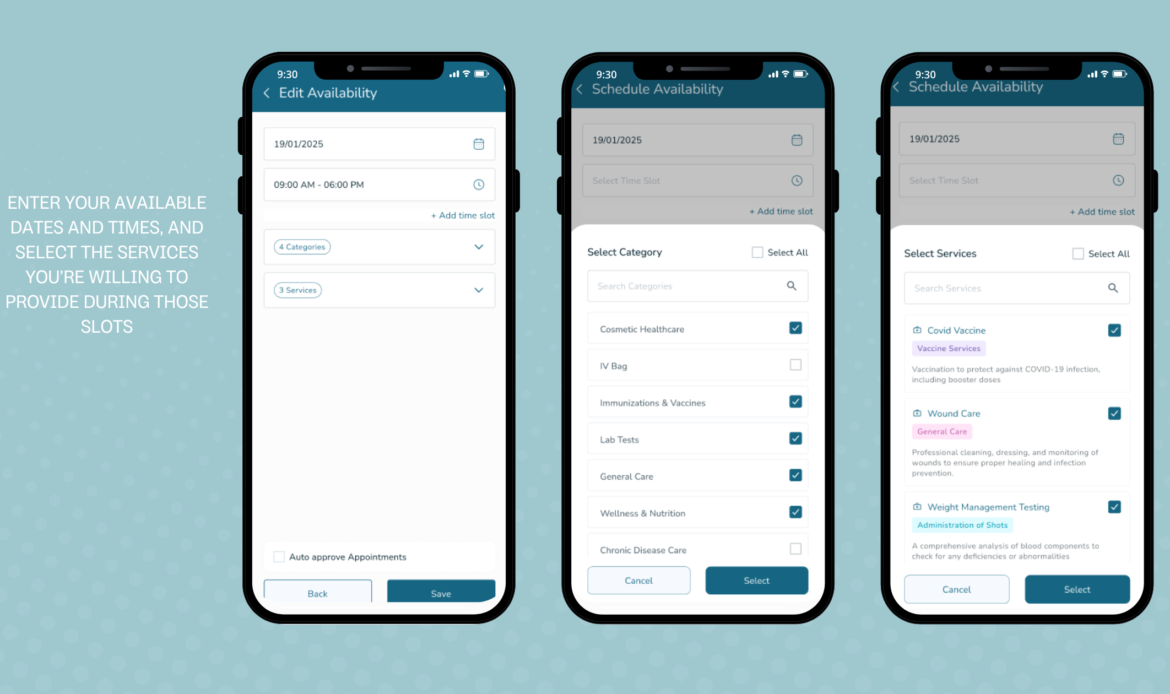
Step 6: Set Your Availability
Once live, you can manage your schedule directly in the app:
- Select available days, times, and services
- Adjust your hours per day as needed
- Enable “Auto-approve appointments” if you want new bookings to be confirmed instantly
- If left unchecked, you’ll have 2 hours to accept or decline each new appointment
- You can also manage your schedule in calendar view to see upcoming and past appointments
This makes it easy for patients to book based on your real-time availability.
Step 7: Start Accepting Appointments
Once your profile is live:
- You’ll get a notification when a patient books with you
- You have 2 hours to accept or decline the appointment — otherwise, it’s automatically confirmed
After accepting, you can:
- View appointment details
- Message the patient
- Prepare for the visit (or telehealth)
💡 Tip: Turn on notifications to stay on top of new bookings!
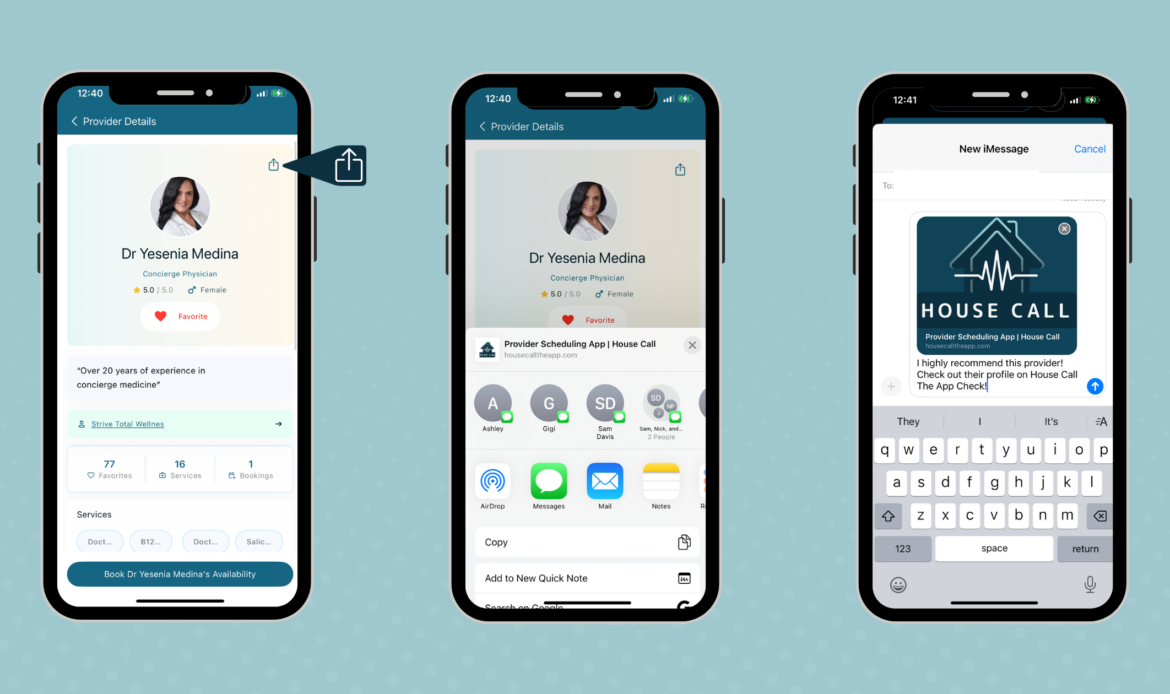
Step 8: Share Your Profile (Optional but Powerful)
You can boost visibility by sharing your profile link:
- Tap the share icon on your profile screen
- Send the link via text, WhatsApp, email, etc.
When someone clicks it, they’re taken directly to your booking page
Need Help?
We’re here to support you at every step!
- Contact our support team anytime: (561) 220-4466
- Visit the Help Center
- Or watch the Provider Onboarding Demo Video
Welcome to House Call! We’re happy to have you on board — and even happier to help you bring care to the people who need it most.